
Duo Directory Synchronization(オンプレAD編)を検証してみた
こんにちは。ネットワークソリューション特集 編集部です。
今回はDuo Directory Synchronization(オンプレAD編)の検証をしてみました。
Duo Directory Synchronizationとは
前回はAzureADとの連携を検証しました。今回はオンプレミスActive Directoryと同期する検証をします。
オンプレActive Directoryでの同期を利用する場合も同じくディレクトリサービスからの1方向です。
Duo側の修正した内容は反映されない+同期で上書きされるので注意してください。
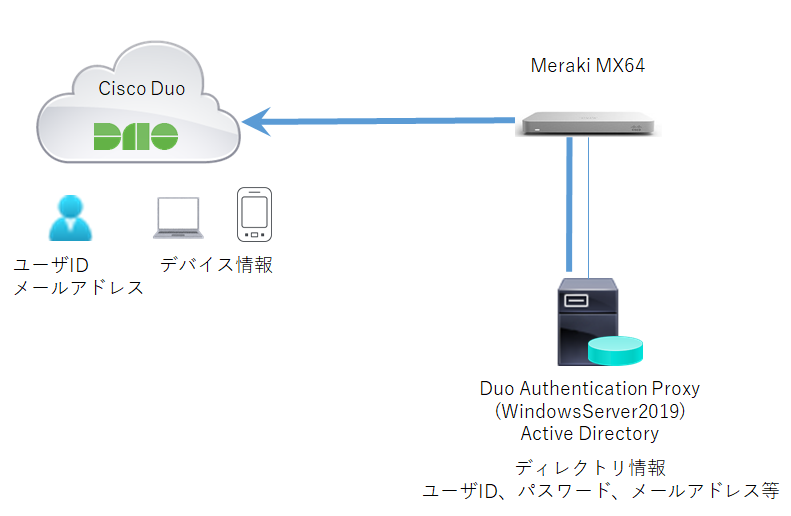
Duo Authntication Proxyが必要ですので、以前に検証したサーバを利用します。
オンプレミスActive Directoryとの連携
詳細な内容についてはメーカマニュアルを参照してください。
AD環境でAttributeを標準のものから変更している場合は環境に合わせて設定してください。
Duo Admin Panelからの設定1
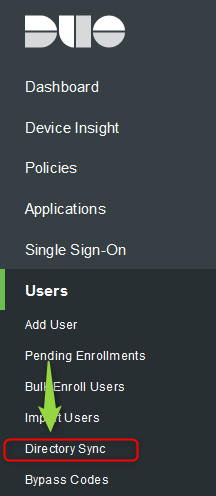
1.「Users」→「Directory Sync」を選択します。
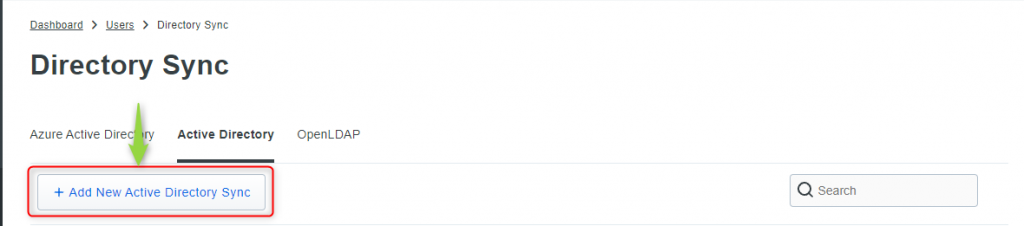
2.「Add New Active Directory Sync」を選択します。
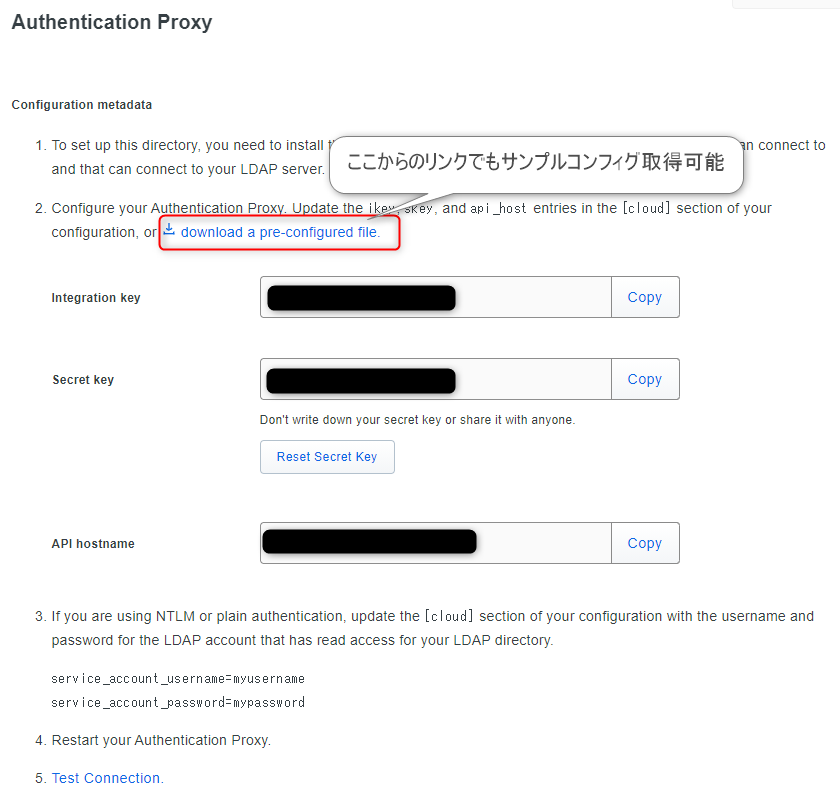
3.Authntication Proxy用のパラメータを控えます。ダウンロードからサンプルコンフィグ取得も可能です。
Authntication Proxy側のコンフィグ設定
1.authproxy.cfgにディレクトリ同期用のコンフィグを追記、保存します。
[cloud]
ikey=<Duo Admin Panelから控えたパラメータ>
skey=<Duo Admin Panelから控えたパラメータ>
api_<Duo Admin Panelから控えたパラメータ>
service_account_username=<AD読み取りID>
service_account_password=<AD読み取りPW>
2.Authntication Proxyサービスを再起動します。
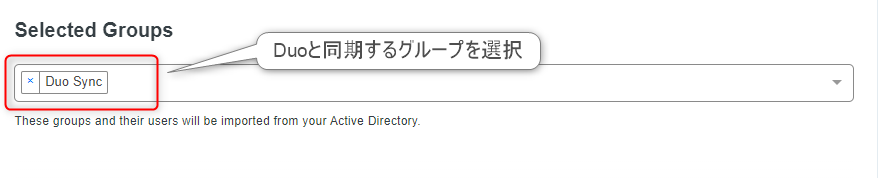
net stop duoauthproxy && net start duoauthproxyなお、今回は事前に「Duo Sync」グループを作成してこちらをDuo同期グループとします。
Duo Admin Panelからの設定2
1.「Test Connection」を選択してAuthntication Proxyと接続します。

2.パラメータが問題なく、DuoクラウドとAuthntication Proxyが接続できれば次のフェーズになります。
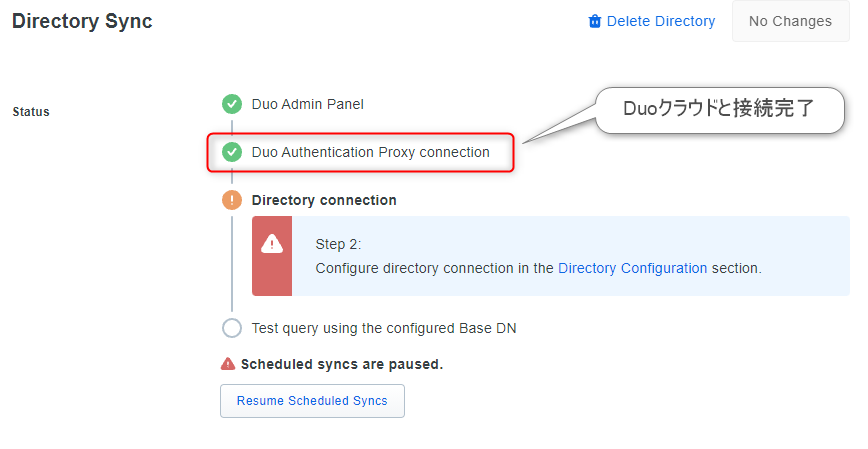
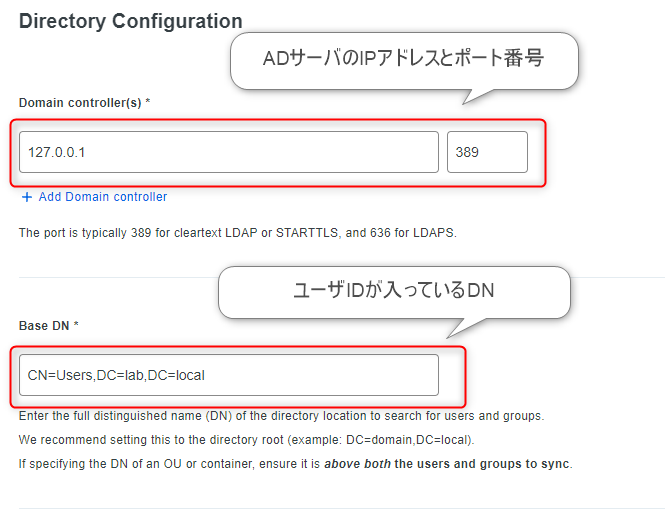
3.次にADサーバ情報を入力します。
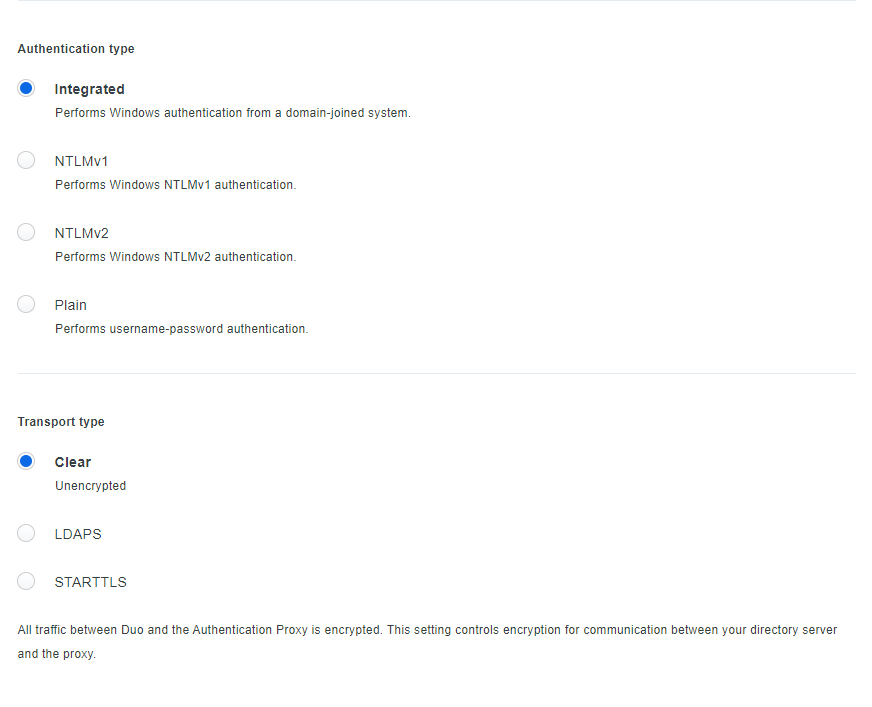
4.環境により認証パラメータを変更します。
5.ディレクトリ設定が問題なければステータスOKとなります。
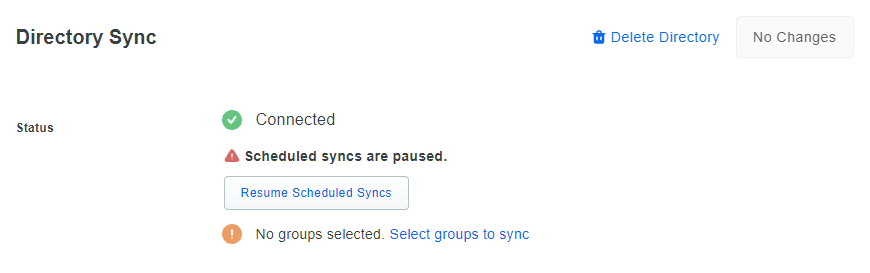
6.Duoクラウドと同期するグループを指定します。
7.即時同期したいので、「Sync Directory Now」を選択します。

8.完了すればADサーバが同期します。

AzureADの時と同じですがデフォルトOFFで、「Send enrollment emails to sync users」にチェックを入れていると
プロビジョニングメールが送信されます。

今回はDuo Directory Synchronization(オンプレAD 編)を検証してみました。